PAINTING AND RECOATING: Parex USA finishes usually look good for a long time. But if you want, you can recoat Parex USA acrylic finishes with DPR Coating or Elastomeric Coating. It should be clear that coatings will change the original finish’s texture and shine. The texture won’t change when you use Recoat Gel. This is especially important to think about if the coating will go over sand or sand fine finish that is already there. Some of the texture may be lost in these finishes because of the size of the aggregates. It is recommended that a physical sample be used to match the color of an existing Parex USA finish, since older finishes may have changed slightly from the original color.
The finish should be dry and clean. The coatings made by Parex USA can be put on with a brush, a roller, or a spray gun (follow the product data sheet for application). Most coatings cover surfaces well with a single coat over existing finishes. Depending on the color and/or texture of the existing finish, you may need to apply two coats. For a single application with a roller, use vertical strokes that overlap by half the width of the roller. For two coats, use horizontal strokes to apply the first coat, then let it dry. The second coat should be put on in the same way as the first, but at a right angle to the first coat.
RESURFACING AND REFINISHING If the finish material needs to be a close match to the color of the existing work, the Parex USA Color Department recommends sending a physical sample for analysis and matching. Even then, the new finish might look a little bit different from the original finish because of age or a difference in how the applicators add texture. If a wall surface needs to be refinished, it might look better to resurface a panel or larger area to an existing break or termination than a smaller patch area.
Patching and Repairing say that refinishing should be done by someone who has used Parex USA materials before. One of the ways listed above must be used to clean the area first. Second, on the clean and dry existing finish, a skim coat of Parex USA base coat (Cementitious/Acrylic type) should be troweled on with a stainless steel trowel to a uniform thickness to fill all the holes made by the original texture. If you want to make the surface more resistant to impact or need to fix other parts with reinforcing mesh, you can embed it into the wet base coat by following the instructions in the Parex USA EIFS application Guide. If primer was used on the original project, use Parex USA Primer to make the new finish more uniform in color and easier to apply with a trowel.
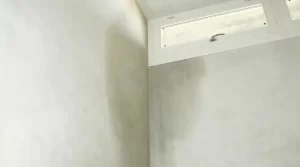
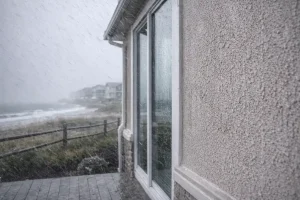
Follow the instructions on the Parex USA Product Data Sheet for the desired finish and texture when putting on the new finish. Sealants and Flashing The first sign of water in the building should be a sign that something is wrong, and it should be fixed as soon as possible. Like other wall claddings, EIFS systems use flashing and sealants to keep moisture from getting behind the cladding.
Because of this, it is a good idea to check the installation at these key places:
- The edges of windows and doors.
- Expansion joints
- Abutments to dissimilar materials.
- Penetrations, such as those around fixtures, hose bibs, outlets, scuppers, etc.
- Wall ends at the top and bottom
- Points where the sidewall and roofline meet In order to fix sealant joints, they may need to be taken apart and put back together.